
AuroraViewer manual
Getting started
AuroraViewer is both a focused image viewer and a review tool that combines folders and archives into one working library. Start by building a library, navigating it, then adding review decisions.
Open your first library
- Install AuroraViewer from the Mac App Store and launch it.
- Choose File > Add File or Folder…, or press Command-O.
- Select one or more images, folders, or ZIP, RAR, or 7z archives.
- Review the source groups and thumbnails in the sidebar, then select an image.
A simple review flow
- Use Left Arrow and Right Arrow to move between images.
- Zoom with Plus and Minus, and press Command-0 to switch between fit and original size.
- Record a 0–5 star rating, or mark Pick with P and Reject with X.
- Continue with Finder tags, Compare mode, or export for the images you want to keep working with.
Know the main areas
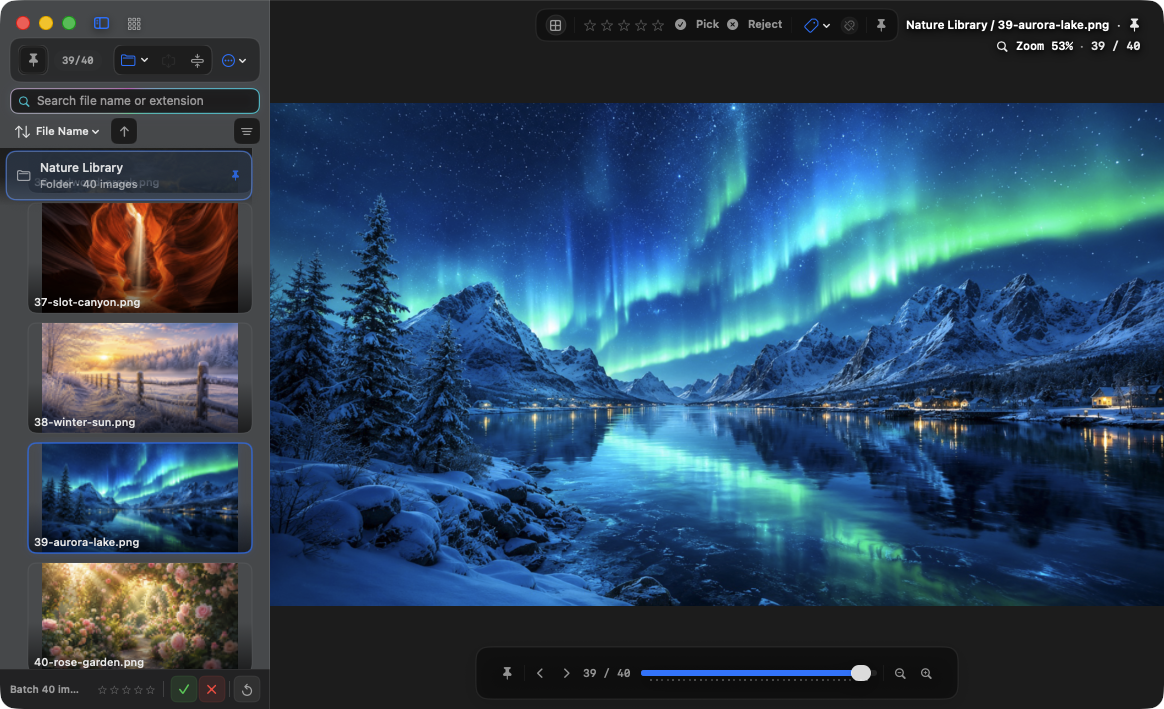
- Sidebar: manage input sources, search, sorting, filters, and multiple selection.
- Canvas: displays the current image, a two-page spread, or Compare slots.
- Top controls: manage ratings, Pick/Reject, Finder tags, and view state.
- Bottom slider and overlays: help with navigation, zoom, file information, the minimap, and histogram.