
AuroraViewer manual
Export, crop, and metadata
Saving an original under another name and re-encoding pixels into another format produce different results. Choose the path that matches your intent.
Export the current image with conversion
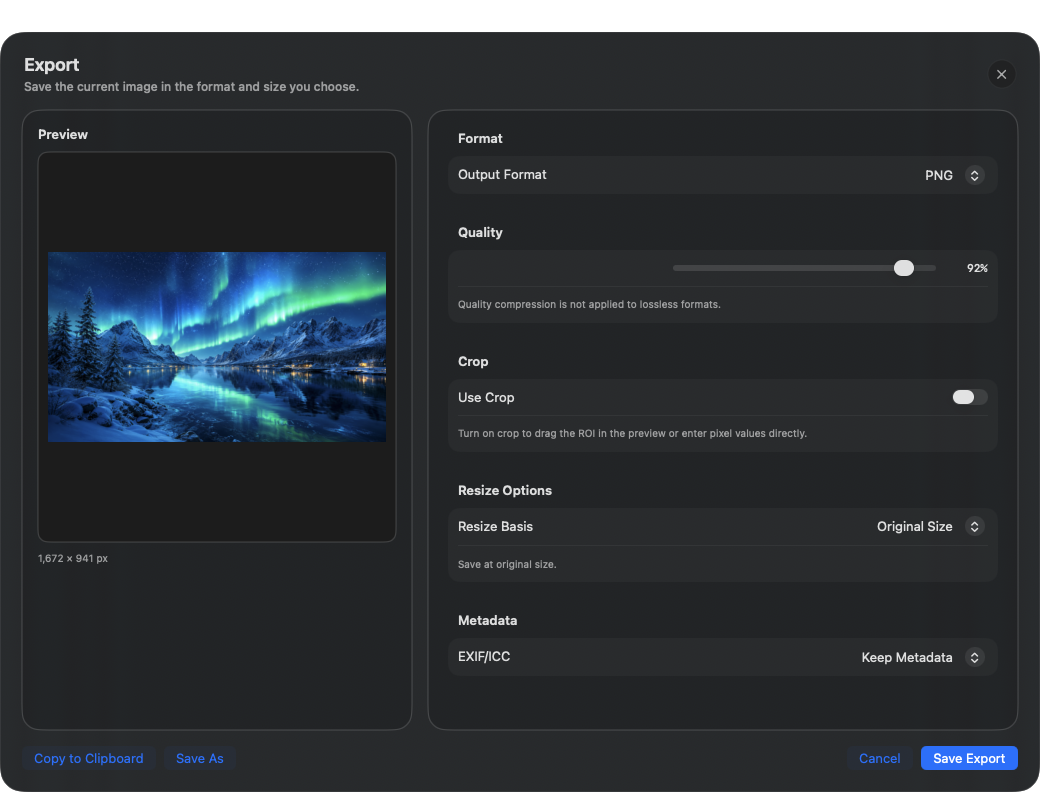
- From File > Export, choose Open Export Sheet…
- Choose PNG, JPEG, TIFF, HEIC, or WebP.
- For JPEG, HEIC, or WebP, choose 10–100% quality.
- Review crop, size, and metadata policy.
- Choose a destination and file name, then export.
Crop and resize
- Draw, move, and resize the crop on the preview, or enter X, Y, width, and height in pixels.
- An ROI for the same image is automatically carried into the crop area.
- Choose original size, a 5–300% scale, or explicit width and height in pixels.
- Resize uses an 8-bit sRGB path intended for display and sharing, not archival preservation of high-bit-depth or wide-gamut originals.
Metadata policies
- Keep: copies the first frame's original ImageIO properties where possible.
- Remove Location: removes standard GPS and EXIF subject-location fields.
- Strip Metadata: starts with empty properties and writes only values required by the output.
- Every converted output normalizes pixels to the visible orientation and records orientation as 1.
Save originals and batch export
- Save Original As copies the current file's bytes without conversion.
- Batch Export Originals copies originals from a selection, group, or filtered result to a destination folder.
- If a name already exists, a number is added instead of overwriting the file.
- Converted export of an animation saves the first displayed image as a single frame; it does not convert the whole animation.
Edit EXIF
- Select one JPEG, TIFF, or HEIC image.
- Choose Image > Edit EXIF.
- Edit supported description, author, copyright, camera, lens, date, and exposure fields.
- Validate the value formats and save. An empty string removes that key.
- If needed, use Undo Last Operation. It restores only the previous values changed in the editor.